Banner-2

Wednesday, September 19, 2012

How to Make Best Desktop After Installation of Ubuntu Latest Versions

By this most useful article I tell you that I have been using Linux Ubuntu 12.04 Desktop Edition, this version is better than Windows 7 and also better for the securities point of view and also saved your computer from various viruses etc. If you are interested to install Ubuntu Linux 12.04 click here. The latest version of Ubuntu 12.10 Beta-1 is available download click here and original  version of Ubuntu Linux 12.10 will be available at the end of October 2012.  Now what things do you do after installation of Ubuntu Linux 12.04 or latest version, you can use following things. 

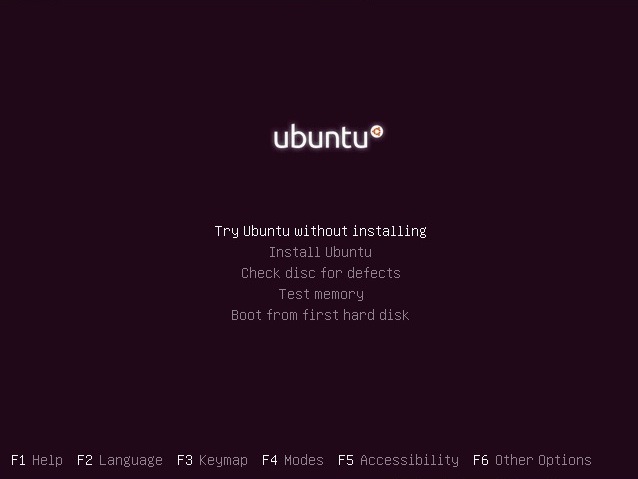
1. After the installation of Ubuntu Linux latest version, I further say that Ubuntu Linux is not like Windows but you have to work more after installation, when your installation would be completed look at the picture given below:


2. Now open terminal use command Ctr+Alt+T and use following two commands for update and upgrade and also system would have to take some time to update and upgrade Ubuntu Linux version.

sudo apt-get update
sudo apt-get upgrade


3.  In my experience  following method is better to install all required files, Multimedia codecs and software's etc in Ubuntu 12.04 or fresh version. I have tested it very useful but  you should have minimum space of 40 GB Hard Disk for doing this function. Follow the following instructions.

Open terminal use Ctr+Alt+T and use the following command to download post instillation Python Script.

cd Desktop
wget http://debianhelp.files.wordpress.com/2012/06/ubuntu-1204-post-install-tar.doc
cp ubuntu-1204-post-install-tar.doc ubuntu-1204-post-install-tar.gz
tar -xvf ubuntu-1204-post-install-tar.gz
sudo chmod a+x ubuntu-12.04-postinstall.py


After that  you need to select computer architecture Ubuntu OS is running, if you are using 32-bit ISO type the following command in terminal.

sudo ./ubuntu-12.04-postinstall.py -c mycfg32.cfg

If you are using 64-bit ISO use the following command

sudo ./ubuntu-12.04-postinstall.py -c mycfg64.cfg

Ok now you are done and you have to wait long time  your system would be install all necessary software's and other files on Ubuntu Linux 12.04 or better latest version and you will look like following picture.


4. If everybody want to install better things manually i guide you step by step see the following instructions.

You are using Nvidia video graphics Card and you are still having problem  and you would like to give Nvidia a try here is how you can install the very latest Nvidia drivers and use the following commands in terminal. One thing note that if your Nvidia card is automatically detected do not use following commands.

sudo apt-add-repository ppa:ubuntu-x-swat/x-updates
sudo apt-get update
sudo apt-get upgrade

You have not Nvidia Graphic card and you are using Intel Graphic cards or other Graphic cards use the following command in terminal and update your graphic card driver.

sudo apt-get install mesa-utils

5. MEDIBUNTU repository provides all the playback and encoding potentials that most Windows and Mac systems have, but which Ubuntu’s decline to comprise by default in their systems, due to licensing limitations and a be short of of open-source code for those features. If you just require obtaining AAC playback, copyright DVDs playing, and latest  versions of all the audio, video, and font files, load Medibuntu into your system and use the following command in terminal 

sudo wget --output-document=/etc/apt/sources.list.d/medibuntu.list http://www.medibuntu.org/sources.list.d/$(lsb_release -cs).list && sudo apt-get --quiet update && sudo apt-get --yes --quiet --allow-unauthenticated install medibuntu-keyring && sudo apt-get --quiet update
sudo apt-get -y update && sudo apt-get -y upgrade
sudo apt-get install app-install-data-medibuntu apport-hooks-medibuntu

After completion of above command if you are using 32-bit version use the following commands.

sudo apt-get install w32codecs libdvdcss2
sudo apt-get install libdvdnav4
sudo apt-get install libdvdread4
sudo /usr/share/doc/libdvdread4/./install-css.sh

If you are using 64-bit version use the following commands

sudo apt-get install w64codecs libdvdcss2
sudo apt-get install libdvdnav4
sudo apt-get install libdvdread4
sudo /usr/share/doc/libdvdread4/./install-css.sh

6.  One thing note that if you are using Ubuntu you should be install Ubuntu restricted and install it to use the following command in terminal and also you can install it by using of Ubuntu Software Centre. One thing note thing all necessary codes will be covered in Ubuntu restricted extras and during the installation you should be press Ok button on license agreement. 

sudo apt-get install ubuntu-restricted-extras

7.  Install Ubuntu Tweak Tools to use the following commands in terminal 

sudo add-apt-repository ppa:tualatrix/ppa
sudo apt-get update
sudo apt-get install ubuntu-tweak


8.  If you want to install DVD Codecs Separately it will be useful if you are not installed through above Medibuntu commands. Now install DVD codes and FFMpeg to use following commands in terminal.

sudo apt-get install libdvdread4

sudo /usr/share/doc/libdvdread4/install-css.sh


sudo apt-get install libxine1-ffmpeg gxine mencoder mpeg2dec vorbis-tools id3v2 mpg321 mpg123 libflac++6 ffmpeg totem-mozilla icedax tagtool easytag id3tool lame nautilus-script-audio-convert libmad0 libjpeg-progs flac faac faad sox ffmpeg2theora libmpeg2-4 uudeview flac libmpeg3-1 mpeg3-utils mpegdemux liba52-0.7.4-dev libquicktime2


9. Now install Firewall (UFW & GUFW) this is very powerful tool ufw was developed  to create a server-level firewall use the following commands in terminal and see the following pictures to adjust firewall.


sudo apt-get install gufw
gufw


10.  Install Clamtak Antivirus for Ubuntu linux, I say that no problem for virus in Ubuntu but precautionary install Clamtk and update it to save your computer.

sudo apt-get install clamav clamtk

Update latest version of Clamtk use the following command in terminal.

sudo freshclam

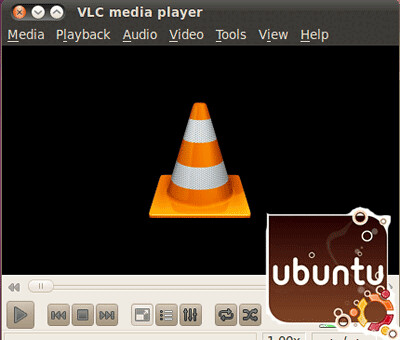
11.  I think there is no problem of Media Player in Ubuntu 12.04 because latest Media Player is already installed in Ubuntu you can use all formats Video and also Audio in Media Player. If you want to install latest VLC player use the following commands in terminal. 

sudo add-apt-repository ppa:videolan/stable-daily
sudo apt-get update
sudo apt-get install vlc


12. Install original Sun Java 7 JDK  for playing Minecraft, and other websites copy and paste the following commands  in your terminal this step will take some time for installation.


sudo apt-get purge openjdk-7-jre icedtea-7-plugin
sudo add-apt-repository ppa:webupd8team/java
sudo apt-get update
sudo apt-get install oracle-jdk7-installer


13. Install Archiver Package Softer for  tar, unrar, p7zip, arj, unace very easily in Ubuntu and also conventions supported by multiple vendors and/or open-source communities. Use the following main command in terminal.


sudo apt-get install unace rar unrar p7zip-rar p7zip zip unzip sharutils uudeview mpack lha arj cabextract file-roller


14.  Install Google Chromium it is better and fast,  I have tested it and it is very fast and easy to use the following easy commands in terminal and install. Another way you can install it from Ubuntu Software centre.

sudo add-apt-repository ppa:chromium-daily/stable
sudo apt-get install chromium-browser chromium-browser-l10n


15.  MultiGet is simply to use and open source download manager for Ubuntu Lunux and also for Windows. It supports HTTP/FTP protocols which covered the necessities of the majority users. The download accelerator supports multi-task with multi-thread on multi-server. It’s also support SOCKS 4, 4a, 5 proxy, ftp proxy, http proxy. MultiGet also supports switching language dynamically; you can choose multiple languages and also it chose  automatically proper language for you. Install it to use the following simple command in terminal

sudo apt-get install multiget


16. Install Adobe Reader it allows users to outlook and print PDF files. Acrobat and Reader are extensively used as a method to present information with a fixed layout alike to a document publication. Install it to use following simple command in terminal.

sudo apt-get install acroread


17. Install qBittorrent is a multi-platform Bittorrent client developed in C++/Qt4 by Christopher Dumez. This software is still under on the go expansion and it turn into more and more useful and I found it very important.  Install it use the following simple commands in terminal.

sudo add-apt-repository ppa:hydr0g3n/ppa
sudo apt-get update && sudo apt-get install qbittorrent


18. Install VideoLAN Movie Creator is a cross-platform, non-linear, video editing software application based on the VLC Media Player. It is very useful to make and create movie, install it to use the following simple commands in terminal.

sudo add-apt-repository ppa:webupd8team/vlmc
sudo apt-get update
sudo apt-get install vlmc frei0r-plugins


19. Install FreetuxTV is a Web TV player for Linux it is very popular online TV you can watch and record free Web TV Channels and also listen to Radio and enjoy evertime. And also direct asf/wmv connections/downloads for streaming media. It  runs on VLC as backend comes with several pre-added channels in lot of languages. You will require to open up the required ports on your firewall if it is enabled. Install it to use the following commands in terminal.

sudo add-apt-repository ppa:freetuxtv/freetuxtv
sudo apt-get update
sudo apt-get install freetuxtv


20.  Install BleachBit quickly frees disk space and untiringly guards your solitude. Free cache, delete cookies, obvious Internet history, shred temporary files, delete logs, and throw away junk you didn’t recognize was there. Designed for Linux and Windows systems, it wipes clean 90 applications including Firefox, Internet Explorer, Adobe Flash, Google Chrome, Opera, Safari, and more. I recommended that installing this on your system and make sure that it automatically run at system login as a reminder. Install and run it to use the following commands.

sudo apt-get install bleachbit
sudo bleachbit


In view of the above I have mentioned main and important things for your best desktop of Ubuntu, if you required more things use Software Centre in latest Ubuntu, if you want to install Ubuntu click here.

Leave your comments.

Enter your email address:

Delivered by FeedBurner


Share/Bookmark

GM Qazi

Hardware and Software Engineer SEO Specialist Email:gmqazi1973@gmail.com

Tuesday, September 18, 2012

How to Create Linux Bootable USB Flash in Unetbootin


By this useful article you teach that how to create Ubuntu bootable USB Flash in Unetbootin, lot of Ubuntu Linux users want to make USB Flash Drive for Ubuntu Linux or other Linux versions. Now you teach that how you make USB Flash bootable in Unetbootin Software. Further I teach you simple and easy way and better guidance and one thing note in your mind that if you are interested to make bootable USB of Ubuntu 12.04 or later version you should be have 2 GB USB space and format your USB Flash keep it blank. 

This Software is very popular to make bootable USB of Linux Ubuntu or other Linux versions. I have tested that USB Flash driver can usually be read faster than optical drives. Recently  Ubuntu 12.04 LTS Desktop Edition ISO file sizes are now over 700 MB, which ways you cannot even burn it to CD any more. You would have to waste all 4 GB blank DVD and other more reasons you should be "burn" to USB instead. First download Unetbootin click here and then I will guide you step by step.

1.   When your downloading complete you will see the following picture click on yes button.


2.  Now look at the following picture with carefully and then you will be presented with two more options. You can either select Ubuntu from the distribution list and leave it up to UNetbootin to download the Ubuntu ISO file  for you or, if you already have the ISO file  downloaded, select the ISO file yourself.


3.  When you have done all functions to look the above picture after that select USB Flash Drive you want to burn it the ISO file and then click on OK button for more guidance look at the following picture.


4.  Now Unetbootin software in working position and copying files on your USB Flash Drive and also making Boot files, wait and do not hurry up for more guidance look at the picture below.


5.   Now you are done and reboot your system and continue to installation of Ubuntu Linux or any version for more guidance look at the following picture.


If you like this article leave your comments, and further more you want to install Ubuntu linux click here.

Enter your email address:

Delivered by FeedBurner


Share/Bookmark

GM Qazi

Hardware and Software Engineer SEO Specialist Email:gmqazi1973@gmail.com

How to Make Bootable USB in Ubuntu Linux


By this useful article you teach that how to create bootable USB Flash in Ubuntu Linux, lot of Ubuntu Linux users want to make USB stick in any version of Ubuntu. Now you teach that how you make USB Flash bootable. Further I teach you simple and easy way and better guidance. 

I want to know some things in your knowledge that if you are interested to make bootable USB of Ubuntu 12.04 or later version you should be have 2 GB USB space or more, but one thing note that format your Flash Drive and leave it blank. 


1.    I instruct that open Dash in Ubuntu and search Start up Disk creator for more instructions see the following picture.


2.    Further see the following picture and click on other to select downloadable Image ISO.


3.   Now go to the location where you downloadable file available and then open click on the open see the following picture for more guidance.


4.  After that select USB Flash in Bottom box and click on (Markup Disk) pointed in picture has shown below.


Now the process is complete restart your computer and continue to install  Ubuntu Linux. If you want to make bootable USB Flash at Pendrive click here.

Please leave your comments.

Enter your email address:

Delivered by FeedBurner


Share/Bookmark

GM Qazi

Hardware and Software Engineer SEO Specialist Email:gmqazi1973@gmail.com

How to Create Ubuntu Linux Bootable USB Flash in Windows

By this useful article you teach that how you make bootable USB Flash in Windows, lot of Ubuntu Linux users want to install Ubuntu in Windows XP or Windows 7 dual mood. So how you make USB Flash bootable I teach you simple and easy way and better guidance. One software namely Pendrive linux is universal USB image burner is very popular first download it click here and than look at the following instructions. 

Open Universal Pendrive and read the following useful instructions with carefully.

1. Select Ubuntu latest Desktop Edition from Drop Down Menu see the following picture.


2.  Now click on the Browse and and select downloaded Ubuntu ISO Image File follow the following pictures.


3.   After that select USB drive and now create see the following picture.


In view of the above, I hope you have no problem to create bootable USB Flash of Ubuntu in Windows and also I say that Pendrive is very useful image burner and you can also use it in Ubuntu and more linux versions. If you want to install ubuntu with full guidance click here.

Enter your email address:

Delivered by FeedBurner


Share/Bookmark

GM Qazi

Hardware and Software Engineer SEO Specialist Email:gmqazi1973@gmail.com

How to install Popular Ubuntu 12.04 Linux Complete guide


By this useful tutorial I will teach you that how to install Ubuntu 12.04 LTS or latest version of Ubuntu with complete guidance. Ubuntu 12.04 LTS is very popular well-known as the (PRECISE PANGOLIN) released on April 26th, 2012. In the serial of Ubuntu it is 16th release of the Ubuntu Linux. Ubuntu Linux now very popular in all over the World because it is open free and contained lot more facilities. How to install Ubuntu 12.04 LTS and another newly version in your personal computer this tutorial is very useful. Especially those peoples who are new and unaware about Ubuntu they can install it in their computers to read this useful tutorial.

System Requirement

For 32 Bit

512 MB RAM 
64 MB VGA 
30 GB Hard disk 
Processor CPU 1.5 GHz 

For 64 Bit

04 GB RAM 
512 MB VGA (Min)
120 GB Hard Disk
Core i3 processor (2.30 GHz)

I have tested both 32 bit and 64 bit, I have used 32 bit normally on my machine without any problem, but 64 bit is required lot of memory and if you have not enough memory at about 04 GB to 06 GB your system would be slow. So I advised that use 32 bit. 

Installation Requirement

First you have to need Ubuntu 12.04 LTS Desktop ISO image that communicates to your hardware structural design i386 or amd64 and that can be downloaded direct link here. After the downloading of ISO Image File burn the ISO image with CD/DVD burning application for the guidance click here and if you have required to make bootable USB Flash Click here. After that function boot your system by CD/DVD or USB Flash press keys F8, F11 or F12 key according BIOS setup of your computer.

1. See the first boot up blank screen with tiny logos on the bottom  


2.  After that press any key or wait   you will  get the following screen for further process and select your preferred language.


3.  Now your system  have at least 512 MB of RAM, you should be select  (Try Ubuntu), as it will permit  you to do  things as well as for checking of  email, browse the web etc during the installation of Ubuntu see the following pictures.


4.  In this regard If you have only 256 MB or above you should select (Install Ubuntu) see the following picture. 


5. You are new installer after that you will see the following picture on icon shown on the screen (Install Ubuntu 12.04 LTS) see the following picture then select your language and press button to continue.


6.  Now you should be choose (Install Ubuntu) shown in the following picture below and select your concerned language.


7.  Now look at the picture below  an option that asks if you need  to install closed source third party software for MP3 playback and Flash, for example I suggest that this option will require a working internet connection, Ubuntu will detect automatically  wireless connection. One thing note that if you have internet connection tick mark on all options.


8.   After that you have 03 options see in the  picture has  given below, if you want to install Ubuntu in Windows or separate or you want to make separate partitions. If you want to make Linux partitions click here.


9.   Now see the picture below if you are ready to install Ubuntu 12.04 LTS alongside Window press to continue button after selection of option No.1 in above picture then you will see the following picture for more guidance and press Install button. 


10.  Now look at the following picture after that your hard disk will be re-partitioned and you should be keep backup of your files if you thing possible and click on continue button.


11.  After this function Ubuntu will be start to copy the files on your hard drives and also you have been asked some questions and for more simple guidance follow the following pictures.


12.  Finally, the installation will finish and now restart your computer and remove your bootable CD/DVD or USB Flash. 

Enter your email address:

Delivered by FeedBurner


Share/Bookmark

GM Qazi

Hardware and Software Engineer SEO Specialist Email:gmqazi1973@gmail.com

blogger templates | Make Money Online

HostGator Promo vps web hosting Twitter Bird Gadget